
When installing Windows on a hard disk, if you forget to create more volumes, all disk space will be used by the C: drive except for some small reserved partitions. As we know, it is not a good idea to keep a single C: drive and put everything in it. Instead, you had better create separate volumes for applications and personal files. Many users ask if it is possible to shrink the C: drive in Windows 10 without losing data and programs. The answer is yes. To decrease the C: drive in Windows 10, you may use either the inbuilt Disk Management or disk partition software. This article introduces how to shrink the C: drive in a Windows 10 computer using both kinds of tools.
Shrink the C Drive in Windows 10 with Native Disk Management
As in Windows 7/8, the built-in Disk Management tool in Windows 10 has a "Shrink Volume" function. It can decrease the C: drive and data partitions without losing data (though not 100% guaranteed) and even without rebooting the computer. However, it can only shrink NTFS partitions; there are more shortages, which are explained in the next section.
How to shrink the C: drive in Windows 10 via the Disk Management tool:
Step 1: Press Windows and R together, and then click Disk Management in the list.
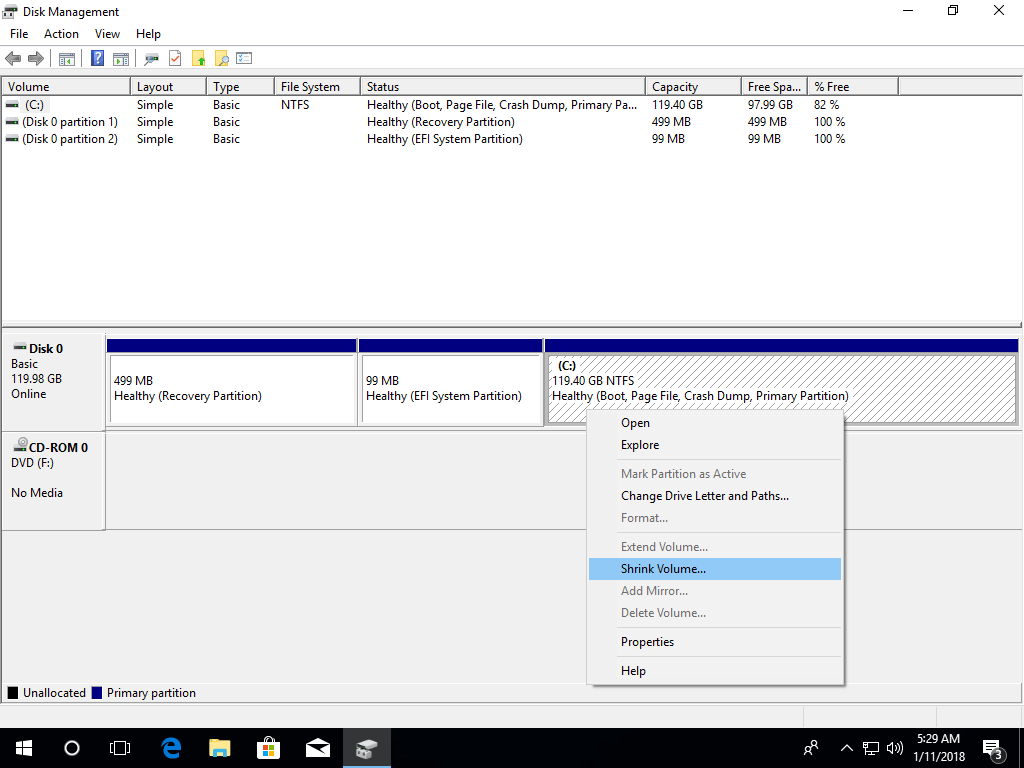
Step 2: Right-click the C: drive and select Shrink Volume.
Step 3: Enter the amount of space, and then click Shrink to execute.
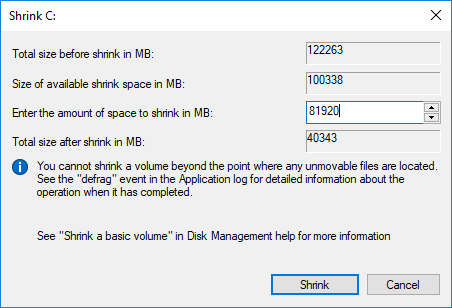
If you do not enter an amount manually, all available free space will be used by default.
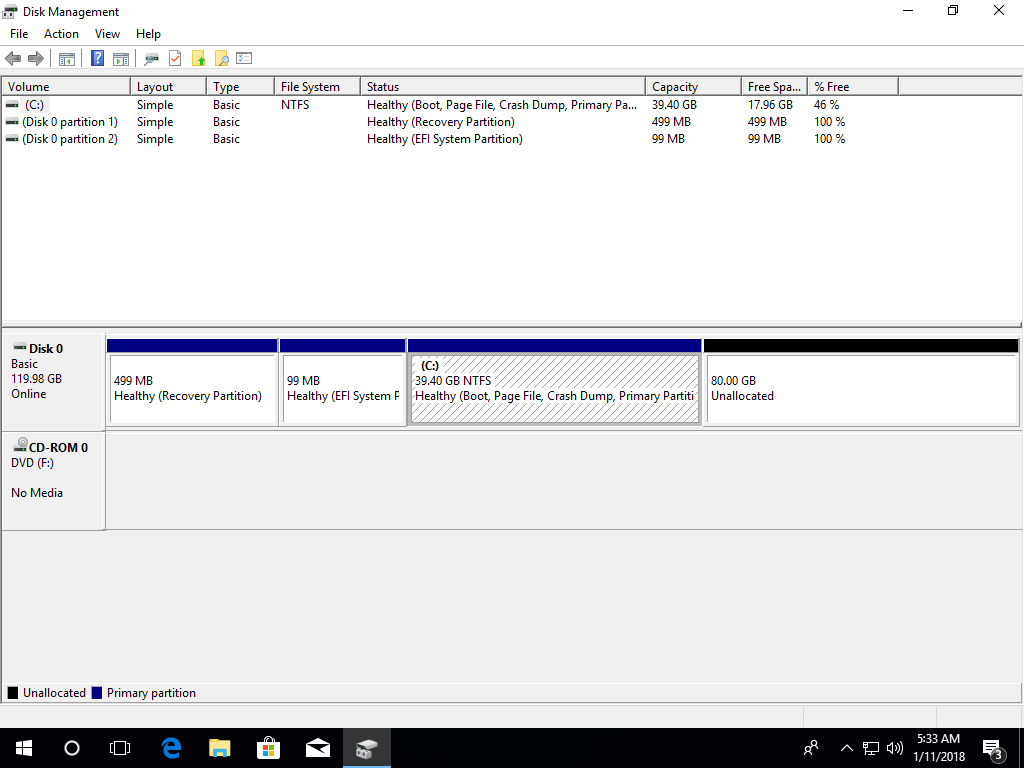
If everything goes well, the C: drive will be shrunk in a short time.
Why Windows 10 Cannot Shrink the C Drive Beyond Half
It is easy to shrink the C: partition in Windows 10 via Disk Management, but this native tool has 3 major shortages when shrinking a partition:
- It cannot change the start position of a volume, so it can only shrink a partition toward the left and generate unallocated space on the right side.
- It can only shrink an NTFS partition. This is not an issue for the system C: drive, but many data partitions are formatted with the FAT32 file system.
- It is unable to shrink the C: drive beyond the point where unmovable files are located.
As mentioned above, the maximum available space is used by default. Many users click the Shrink button directly without entering an amount. It is very likely that they will receive the error message when shrinking the C: drive in Windows 10 - "There is not enough space available on the disk(s) to complete this operation."
If you receive this error, shrink the C: drive again and enter a smaller amount.

The most common issue when shrinking the C: drive volume in Windows 10/8/7 is related to "unmovable" files.
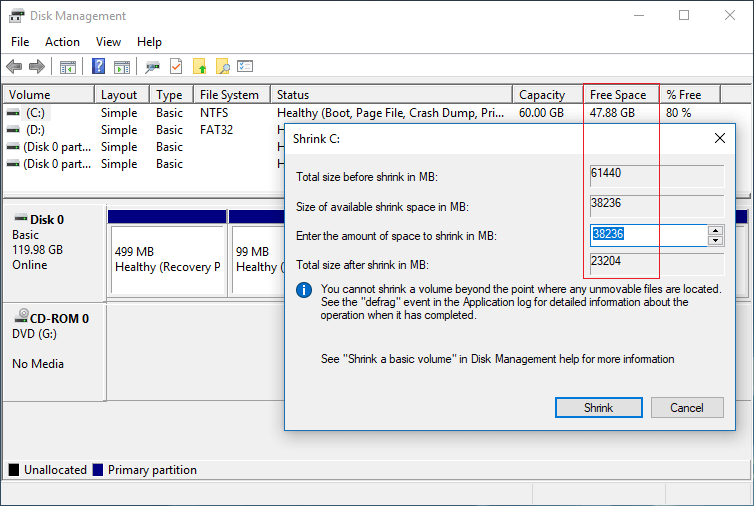
As shown on the test computer, there is 47.88GB of free space in the C: drive, but Disk Management provides a maximum of 38226MB (37.33GB).
There is a tip at the bottom of this dialog box: "You cannot shrink a volume beyond the point where any unmovable files are located."
For example, if the unmovable files are located in block 3, you cannot shrink the C: drive to block 2 or 1, even though there is free space.
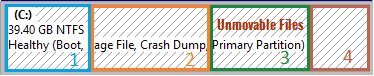
"Unmovable" files include the paging file, hibernation files, system backups, and other large files. Windows cannot move these files. This is why many users report that they cannot shrink the C: drive beyond half or to 100GB on their Windows 10/11 computers.
Shrink the C Drive Beyond Limits with a Free Partition Editor
Compared to Windows Disk Management, NIUBI Partition Editor has more advantages, such as:
- It is able to shrink both NTFS and FAT32 partitions.
- It can change the start location of a partition, so unallocated space can be generated on either the left or right side.
- It can move "unmovable" files, so it can shrink the C: drive or other volumes to a minimum size if you want.
- It can move the position of unallocated space or any volume on the same disk.
To shrink the C: drive in a Windows 10/8/7 computer, you just need to click, drag, and drop on the disk map of NIUBI Partition Editor. It has a free edition for Windows 11/10/8/7/Vista/XP home computer users.
How to shrink the C: drive in Windows 10/8/7 with NIUBI Partition Editor:
Download the free edition, right-click the C: drive, and select "Resize/Move Volume". You have 2 options in the pop-up window.
Option 1: If you drag the left border to the right in the pop-up window:
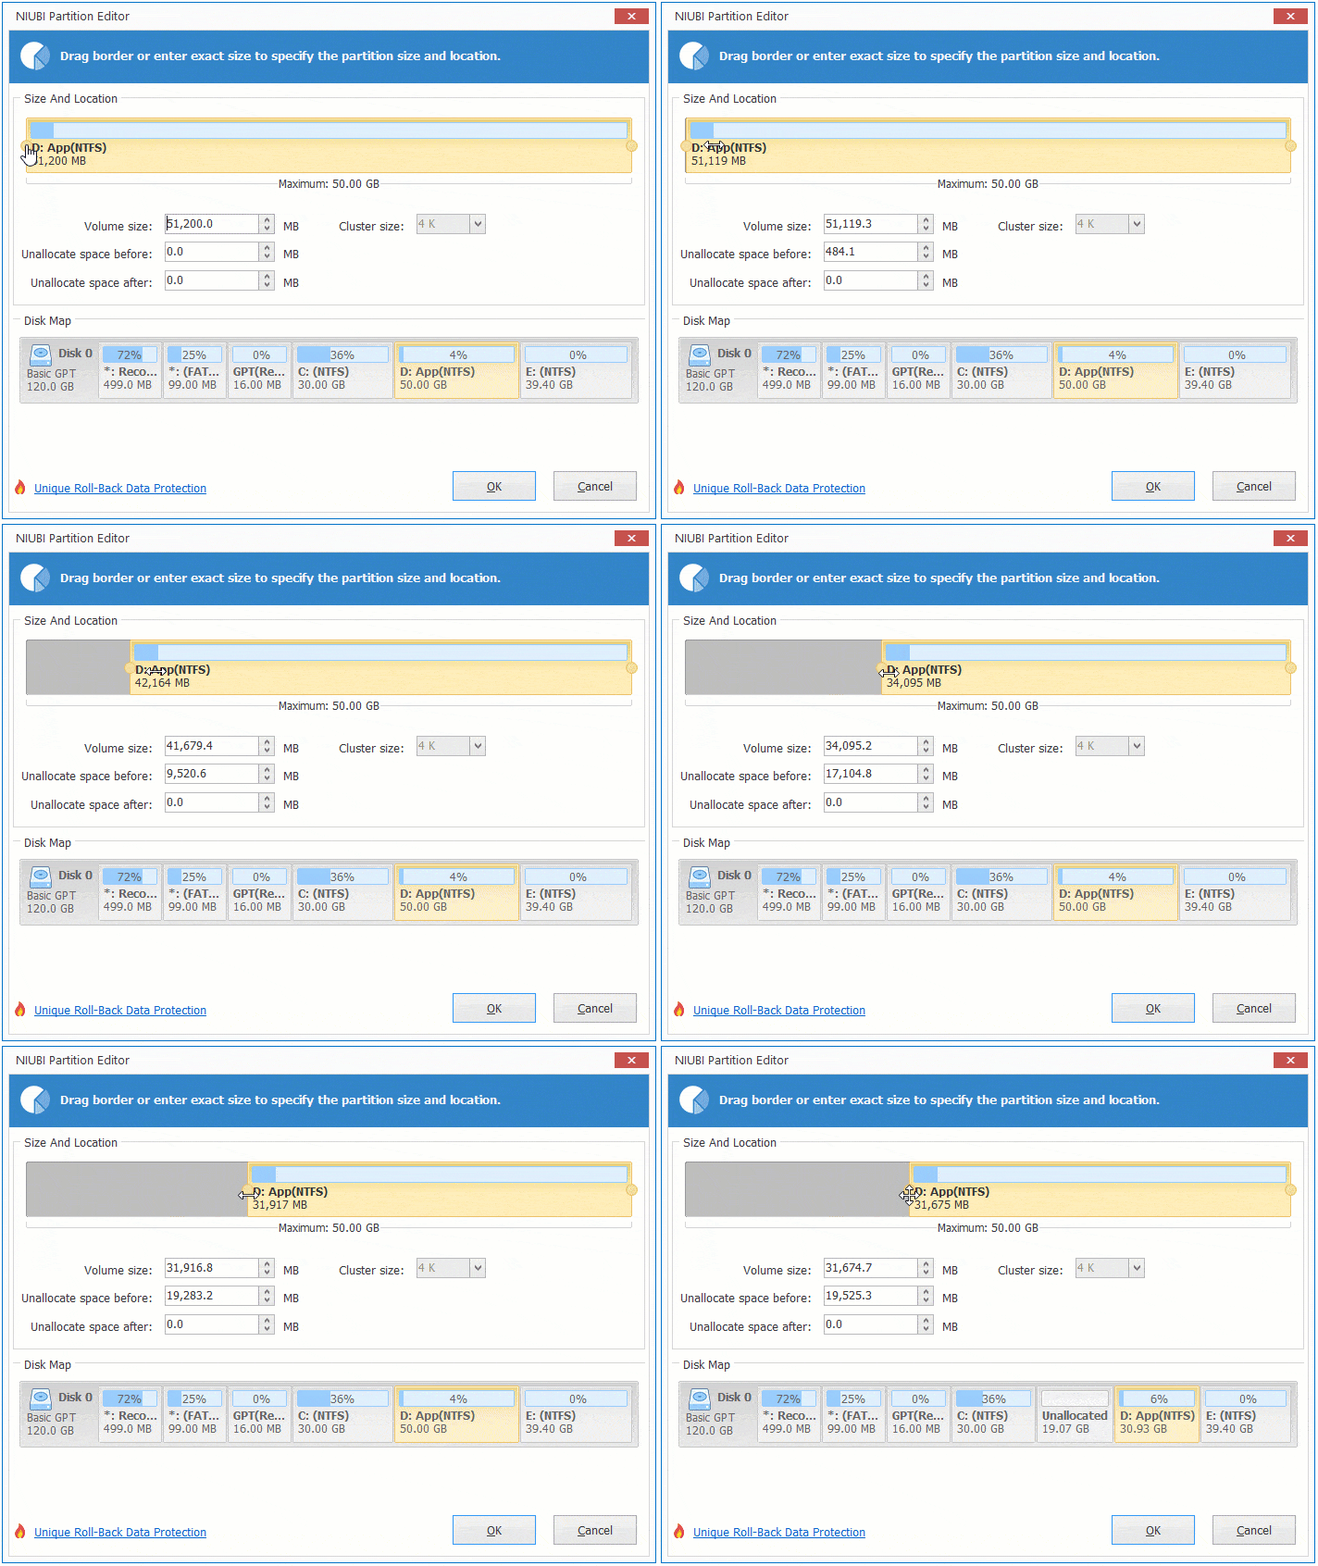
Unallocated space will be generated on the left side of this partition.
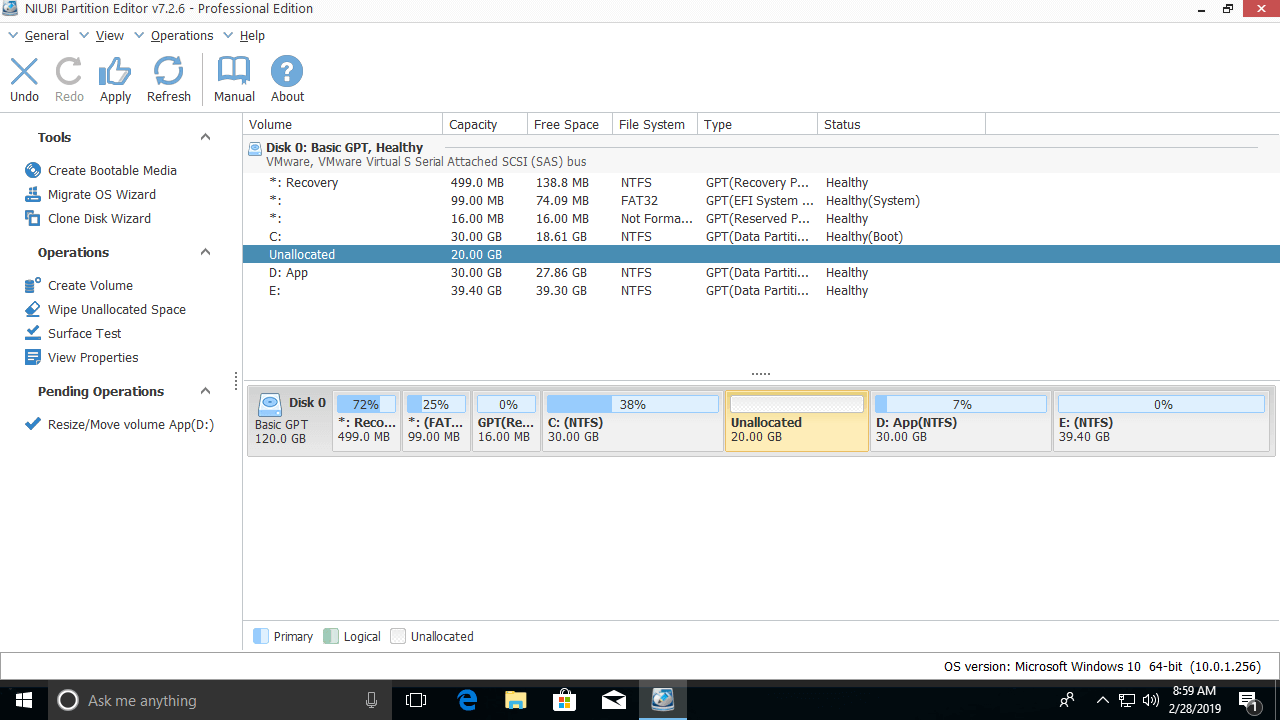
Option 2: If you drag the right border to the left in the pop-up window:
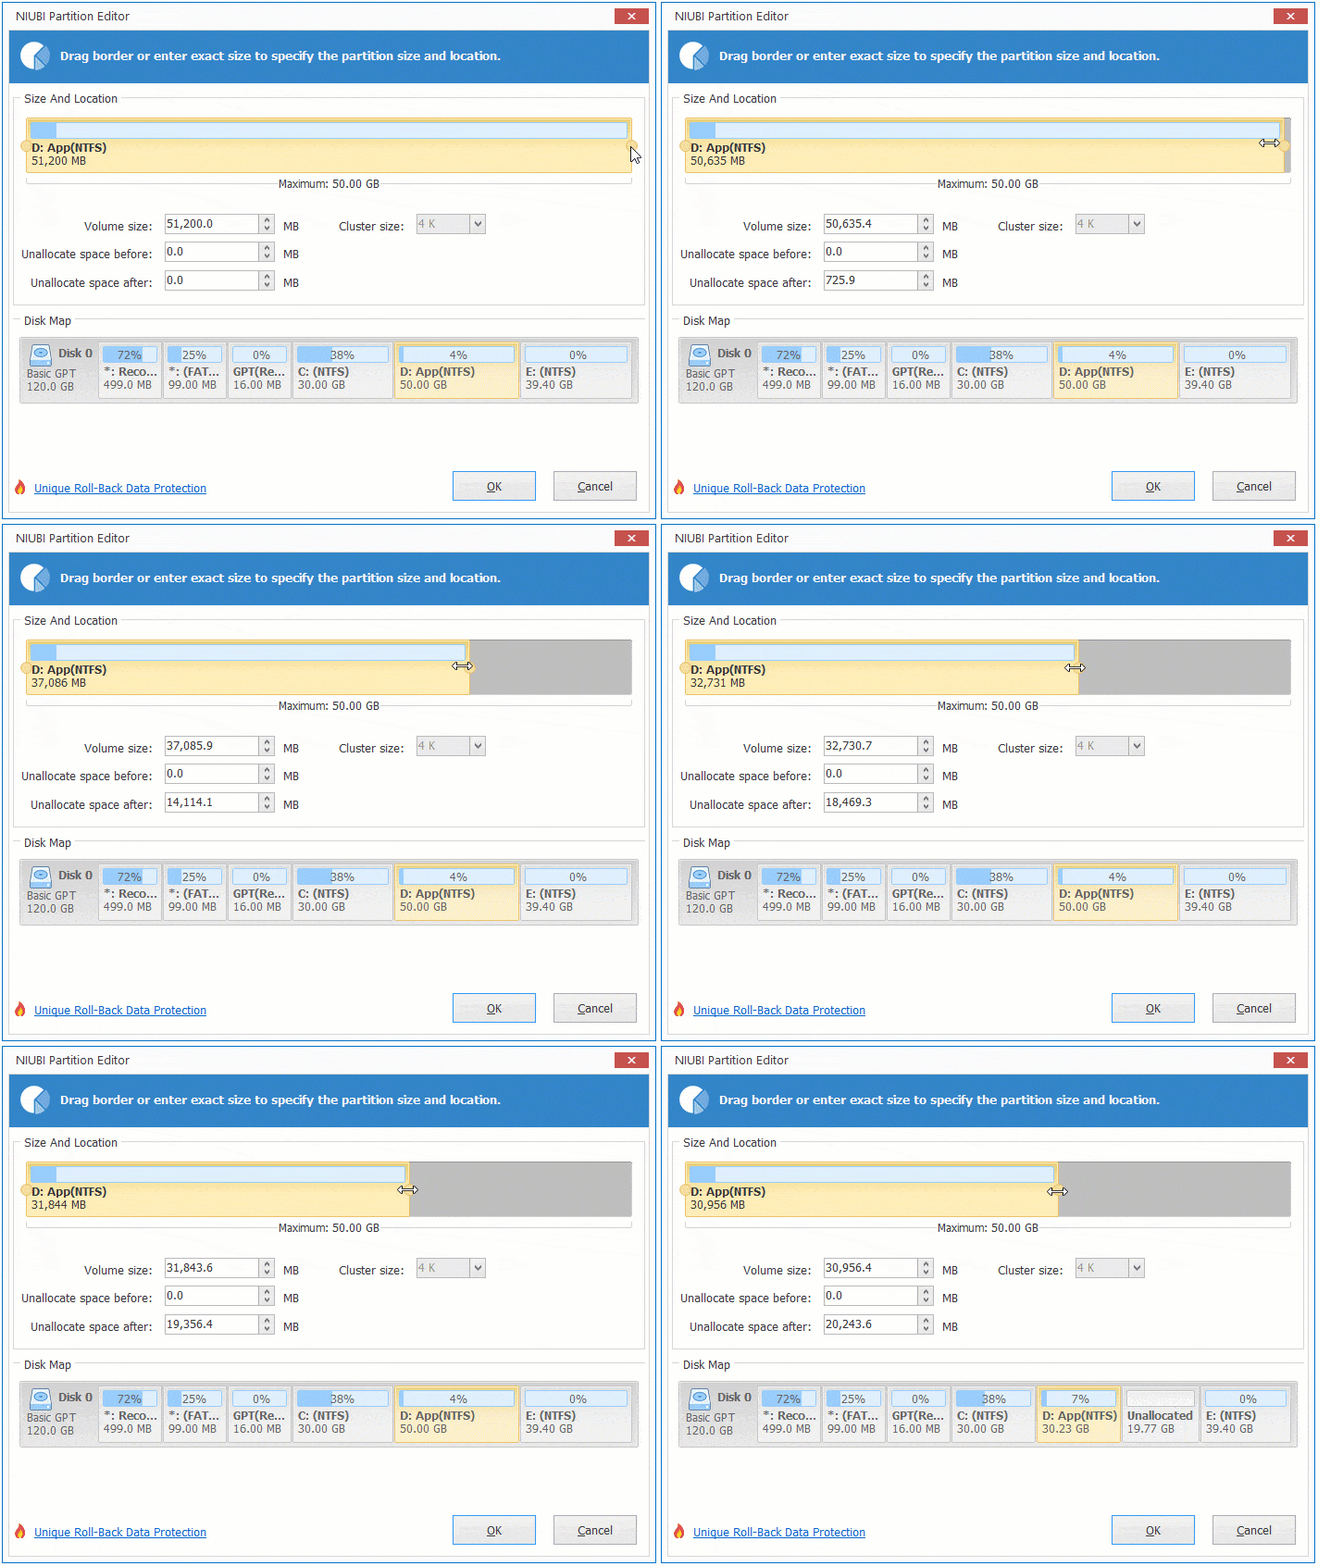
Unallocated space will be generated on the right side of this partition.
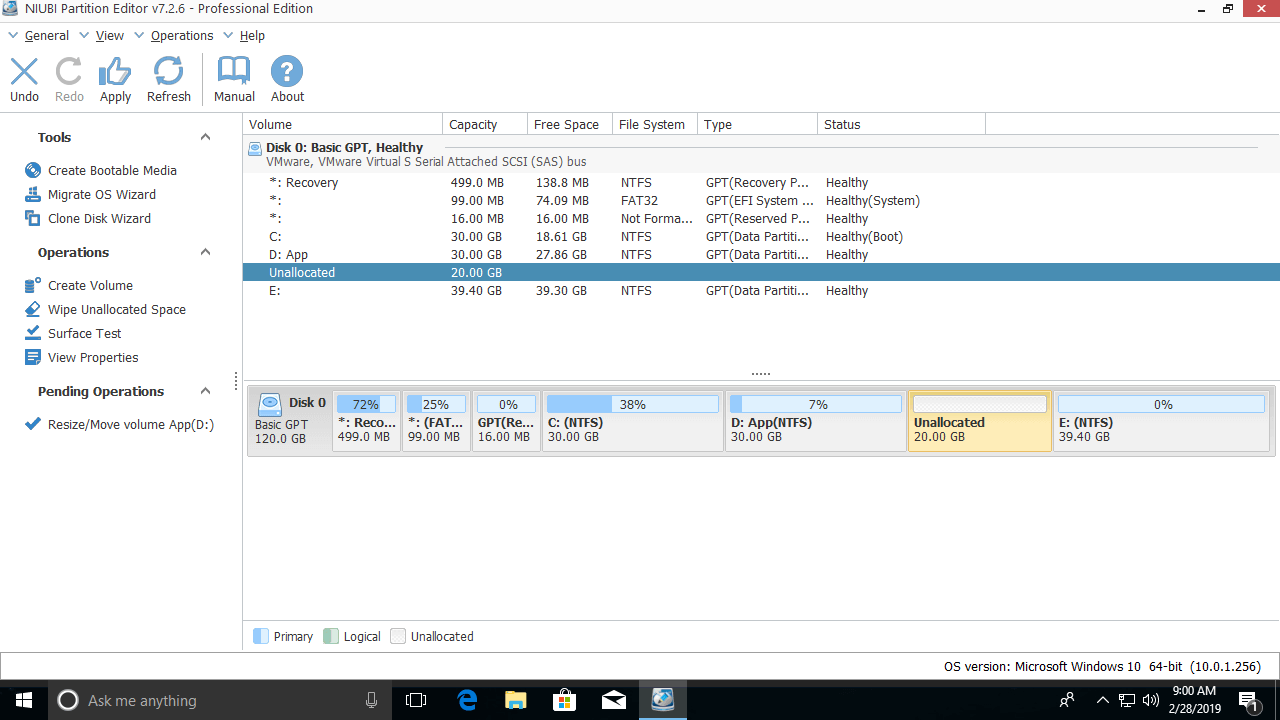
This software is designed to work in virtual mode to avoid mistakes; to change real disk partitions, remember to click Apply on the top left to take effect. Follow the steps if you want to increase the D: drive or extend the system reserved partition after shrinking the C: drive. If you want to create more partitions, right-click the unallocated space in NIUBI and select "Create Volume".
Besides shrinking partitions in Windows 11/10/8/7/Vista/XP, NIUBI Partition Editor helps you extend, merge, clone, move, convert, defrag, wipe, hide partitions, scan for bad sectors, and much more.
 © 2009 - NIUBI Technology All Rights Reserved. |