
Windows 10 has a built-in Disk Management utility to help create, delete, format, and set Active partitions. If you want to repartition a hard drive, the advanced Shrink and Extend Volume functions can help you in some cases. Many people report that the Extend Volume option is disabled for the C: drive in Windows 10 Disk Management but do not know why. This article explains why "Extend Volume" is greyed out in Windows 10 and how to solve this problem easily.
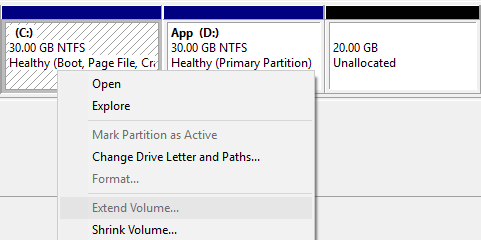
Why Extend Volume Is Disabled for the C Drive
Reason 1: No Available Space
Many Windows 10 users use a 250GB SSD for the operating system and programs. Actually, no matter whether the disk is an SSD or a traditional mechanical drive, and regardless of whether it is 250GB or 500GB, its physical size cannot be increased.
If you want to extend the C: drive, there must be available space on the same disk (or the same RAID array). Available space includes unused space in other volumes or existing unallocated space. Only unallocated space can be added into an allocated partition.
To add unused space to the C: drive, you must shrink or delete other data volumes. By shrinking a volume, you will not lose files in it.
In short, if you did not delete or shrink another volume to get unallocated space first, of course Extend Volume is disabled for the C: drive.
Reason 2: Unallocated Space Is Non-Adjacent
On most computers, the adjacent D: drive is used for programs, so it cannot be deleted. Many people have tried to shrink it with the Shrink Volume function. If you did that, you would have found that unallocated space can only be generated on the right side.
Extend Volume can only extend an NTFS partition when there is adjacent unallocated space behind it.
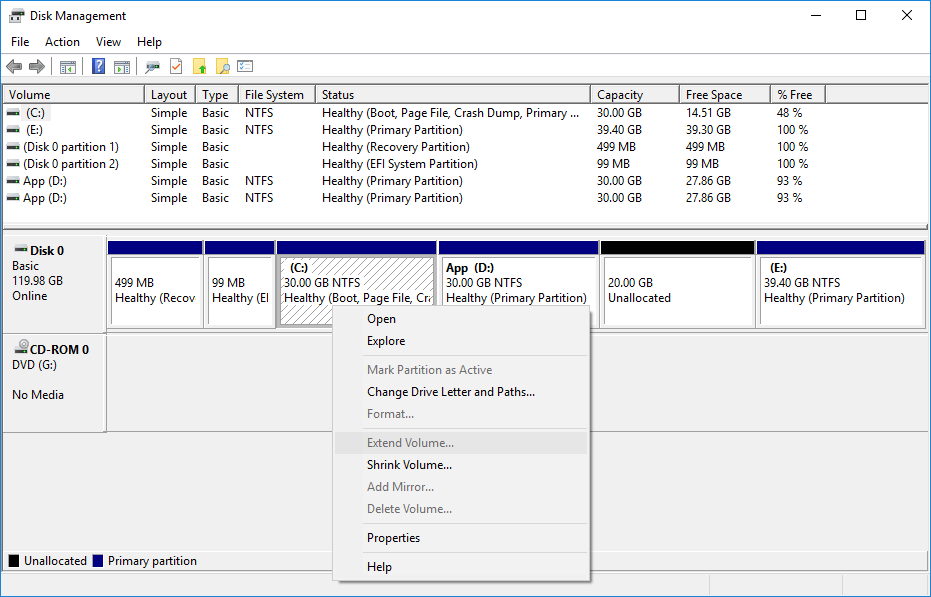
As you can see, there is 20GB of unallocated space after shrinking the D: drive.
When you right-click the C: drive, Extend Volume is disabled because the unallocated space is non-adjacent to C.
This unallocated space also cannot be added to the E: drive by Extend Volume because it is on the left side of E.
If Shrink Volume could generate unallocated space on the left, there would not be such an issue.
This is the most common reason why users report that Extend Volume is disabled for the C: drive in Windows 10 Disk Management.
Reason 3: Limitation of MBR Disk
Many system disks in Windows 10 computers are formatted as GPT by default, so fewer people encounter this problem. First, let's look at the scenario, and then explain the reason.
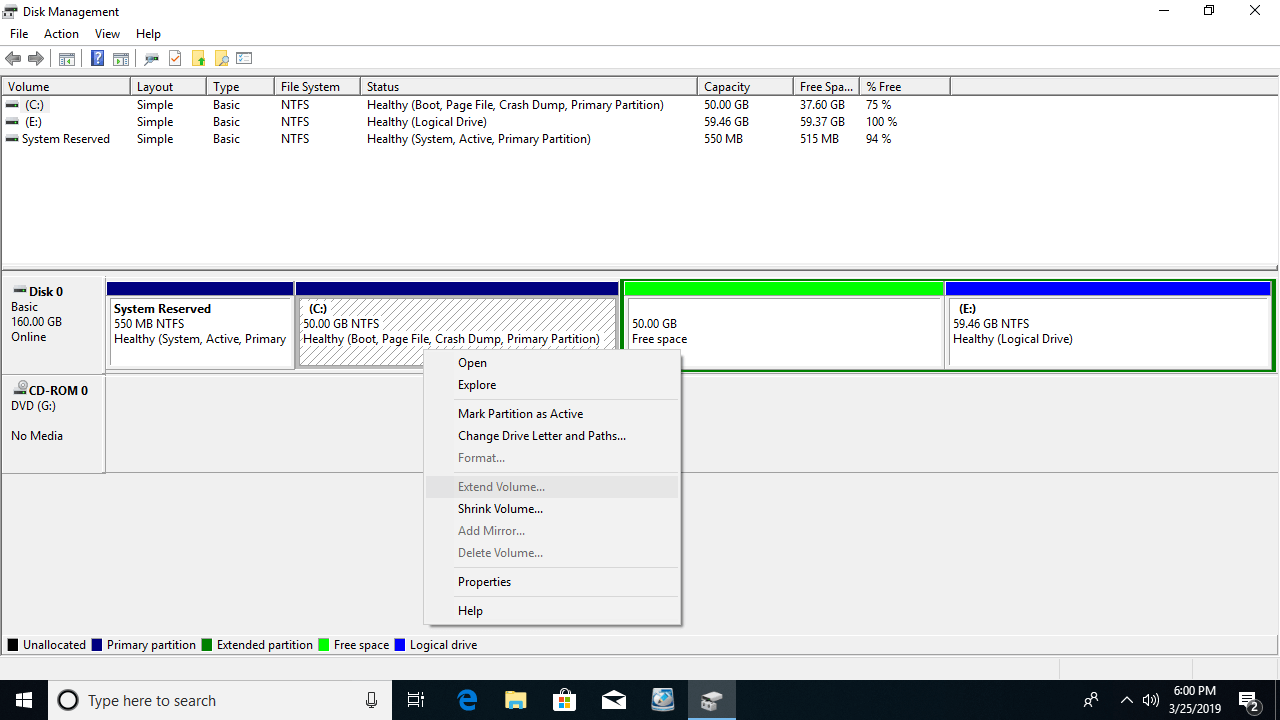
As shown in Disk 0, besides the System Reserved partition, there are 3 partitions: C:, D:, and E:. C is a Primary partition; D and E are Logical partitions.
Extend Volume is still disabled for the C: partition after deleting D.
The disk space of the original D: drive is now showing as Free.
On the bottom left, you will see the type of partitions and space marked with different colors. (You can change the default colors.)
Explanation:
Unlike a Primary partition that works as an independent unit, a Logical partition is part of an Extended partition.
In the Master Boot Record sector of an MBR disk, there are only 4 entries to locate partitions. These entries can be assigned to a maximum of 4 Primary partitions, or 3 Primary partitions plus an Extended partition. An Extended partition works like a container, and all Logical partitions must be created within it continuously.
Thus, you will not get unallocated space by deleting a single Logical partition. You have to delete all Logical partitions and then delete the entire Extended partition.
In short, if the adjacent D: drive is Logical, Disk Management cannot extend the C: drive by either deleting or shrinking D.
Solution for Extend Volume Greyed Out for the C Drive
If you have not shrunk any partitions, follow the steps below to expand the C: drive.
Step 1: Download NIUBI Partition Editor, right-click the adjacent D: drive and select "Resize/Move Volume", then drag the left border to the right in the pop-up window.
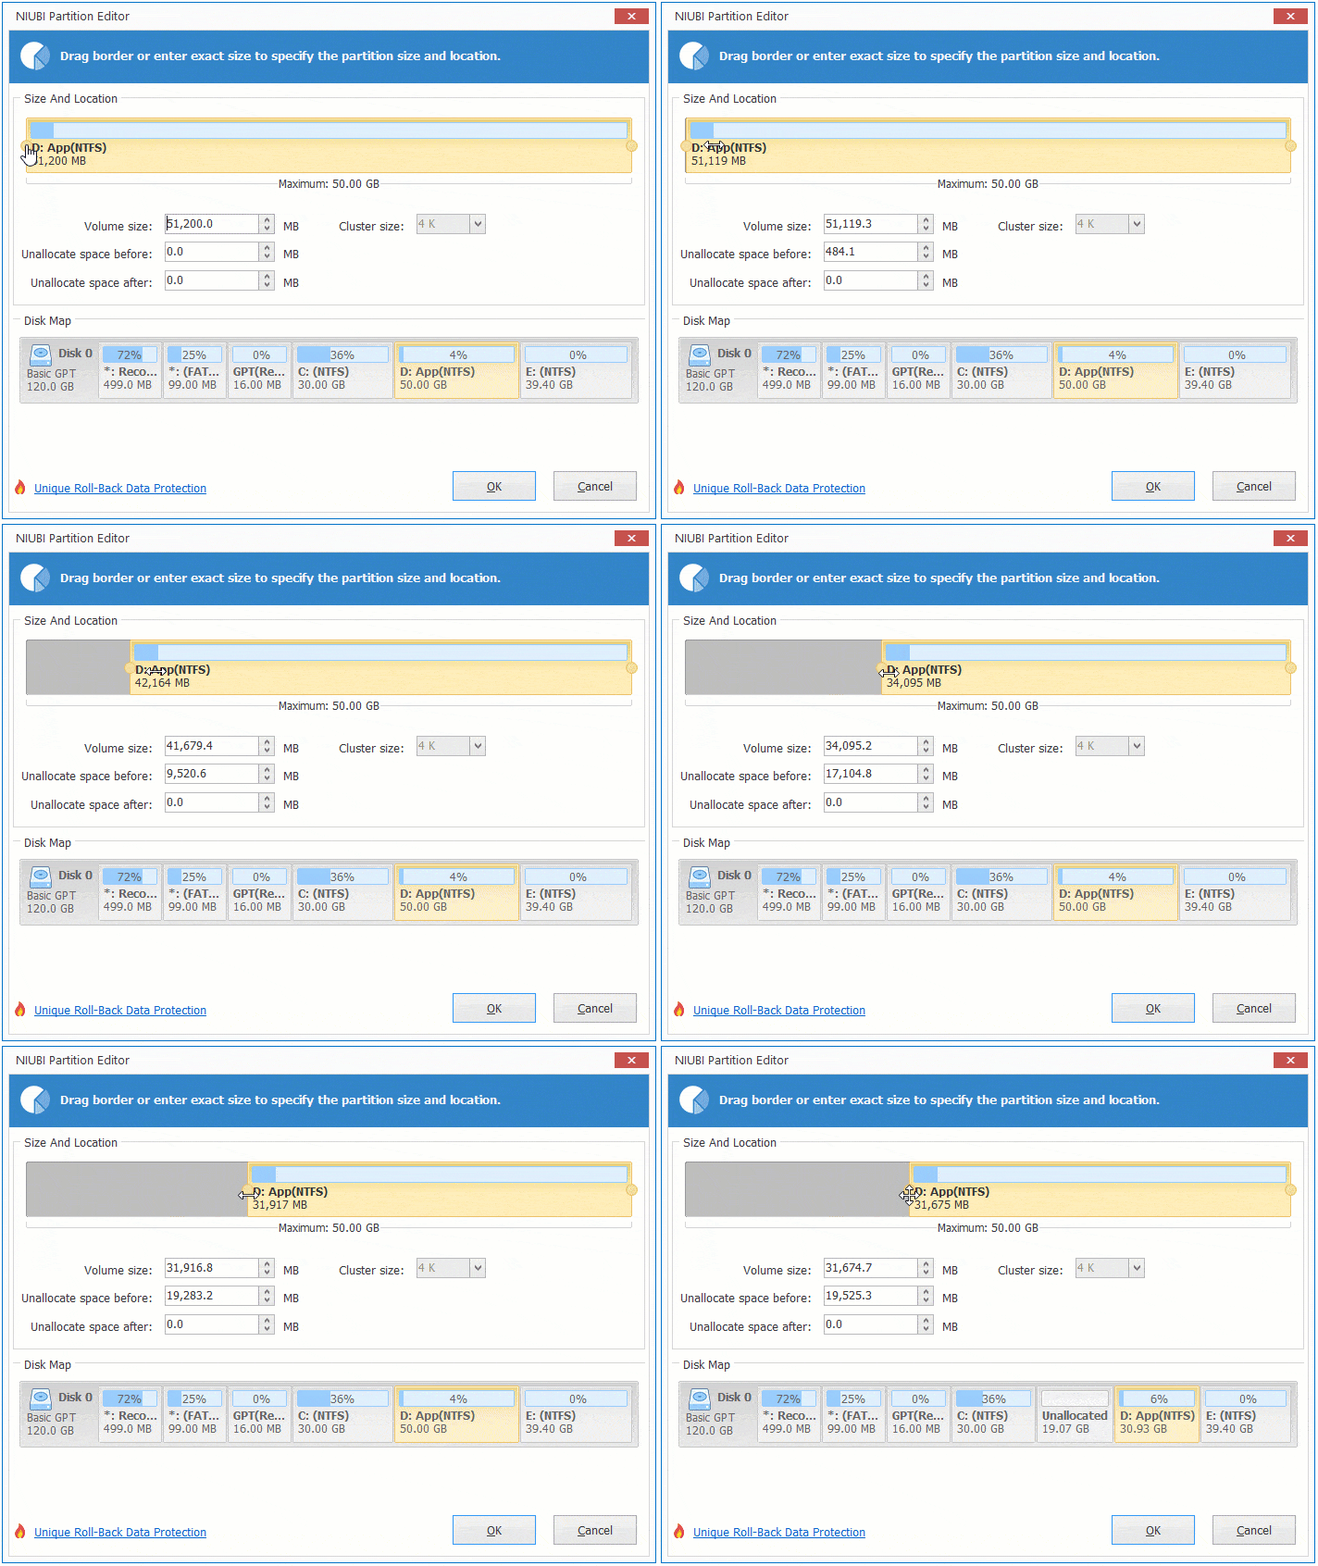
Then, the D: drive is shrunk and unallocated space is generated on its left side.
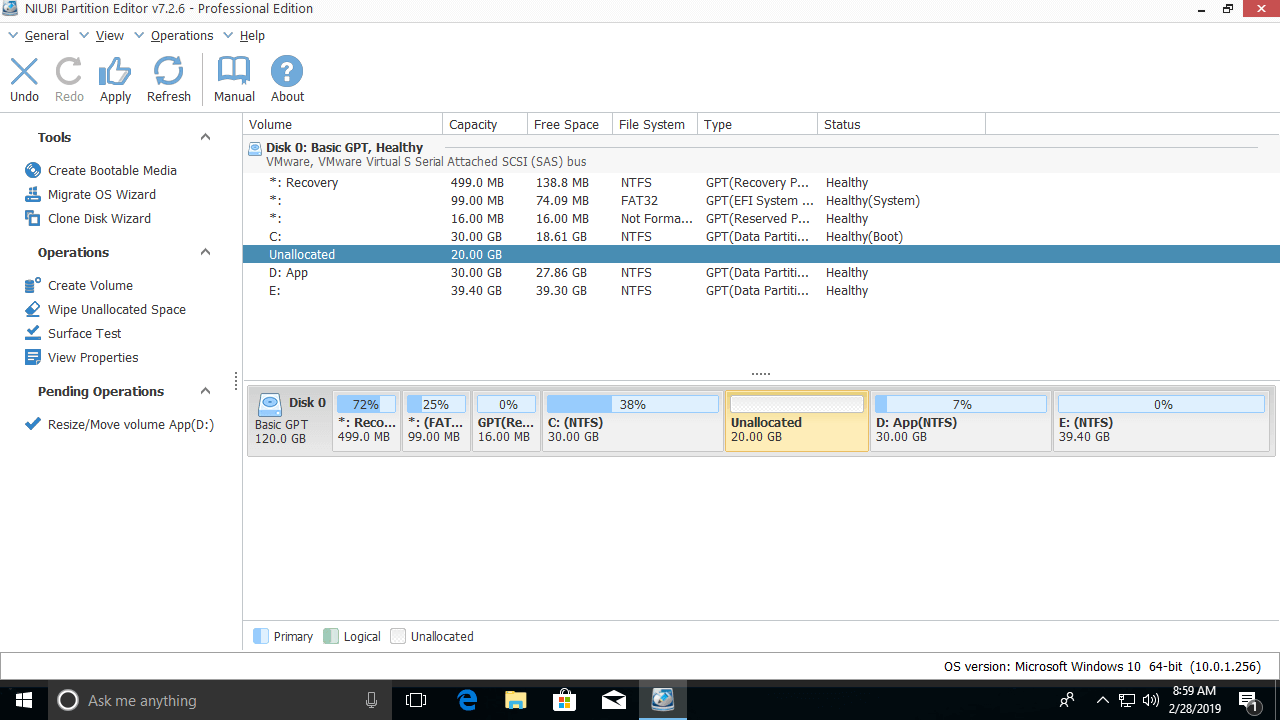
Step 2: Right-click the C: drive and select "Resize/Move Volume" again, then drag the right border to the right to merge the unallocated space.
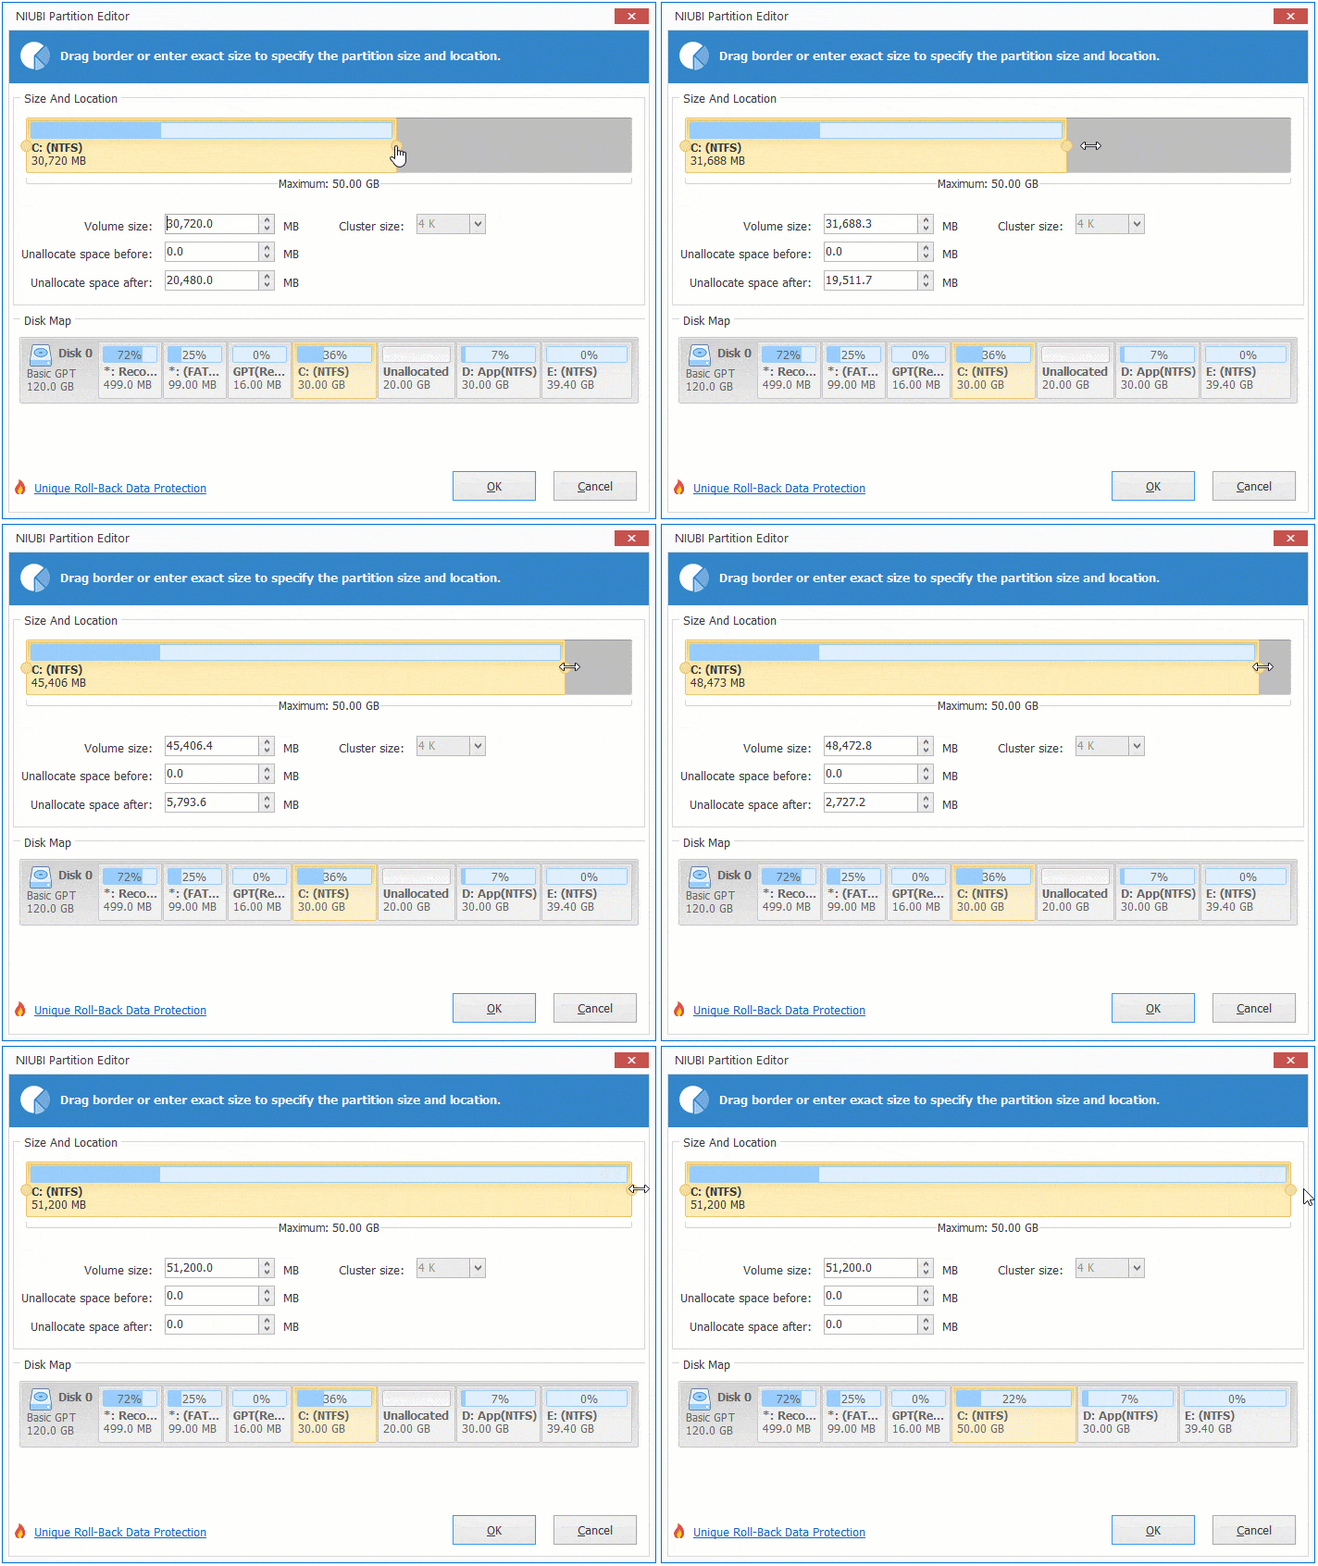
Then, the system C: drive is extended.
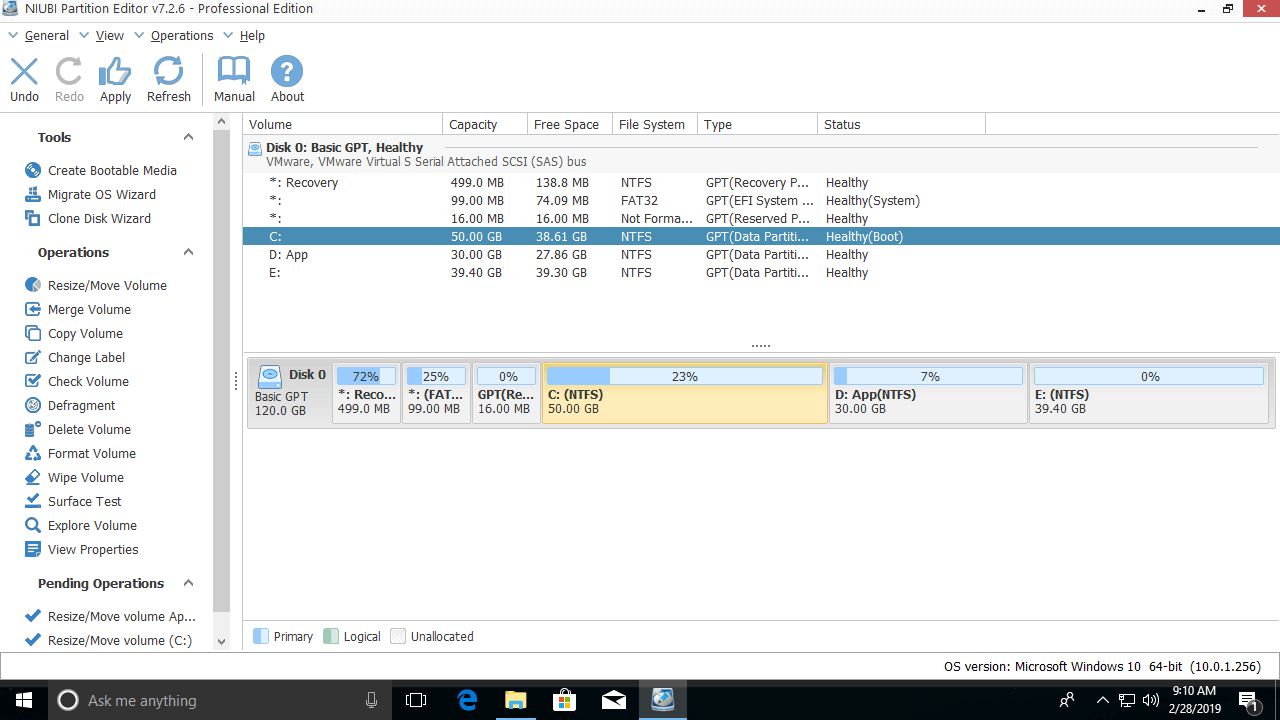
This software works in virtual mode first, and all operations you perform will be listed as pending on the bottom left. You may undo, redo, or click Apply to modify the real disk partitions.
If you have shrunk the D volume via Disk Management, Extend Volume is disabled for the C: drive because the unallocated space is non-adjacent. Follow the steps below.
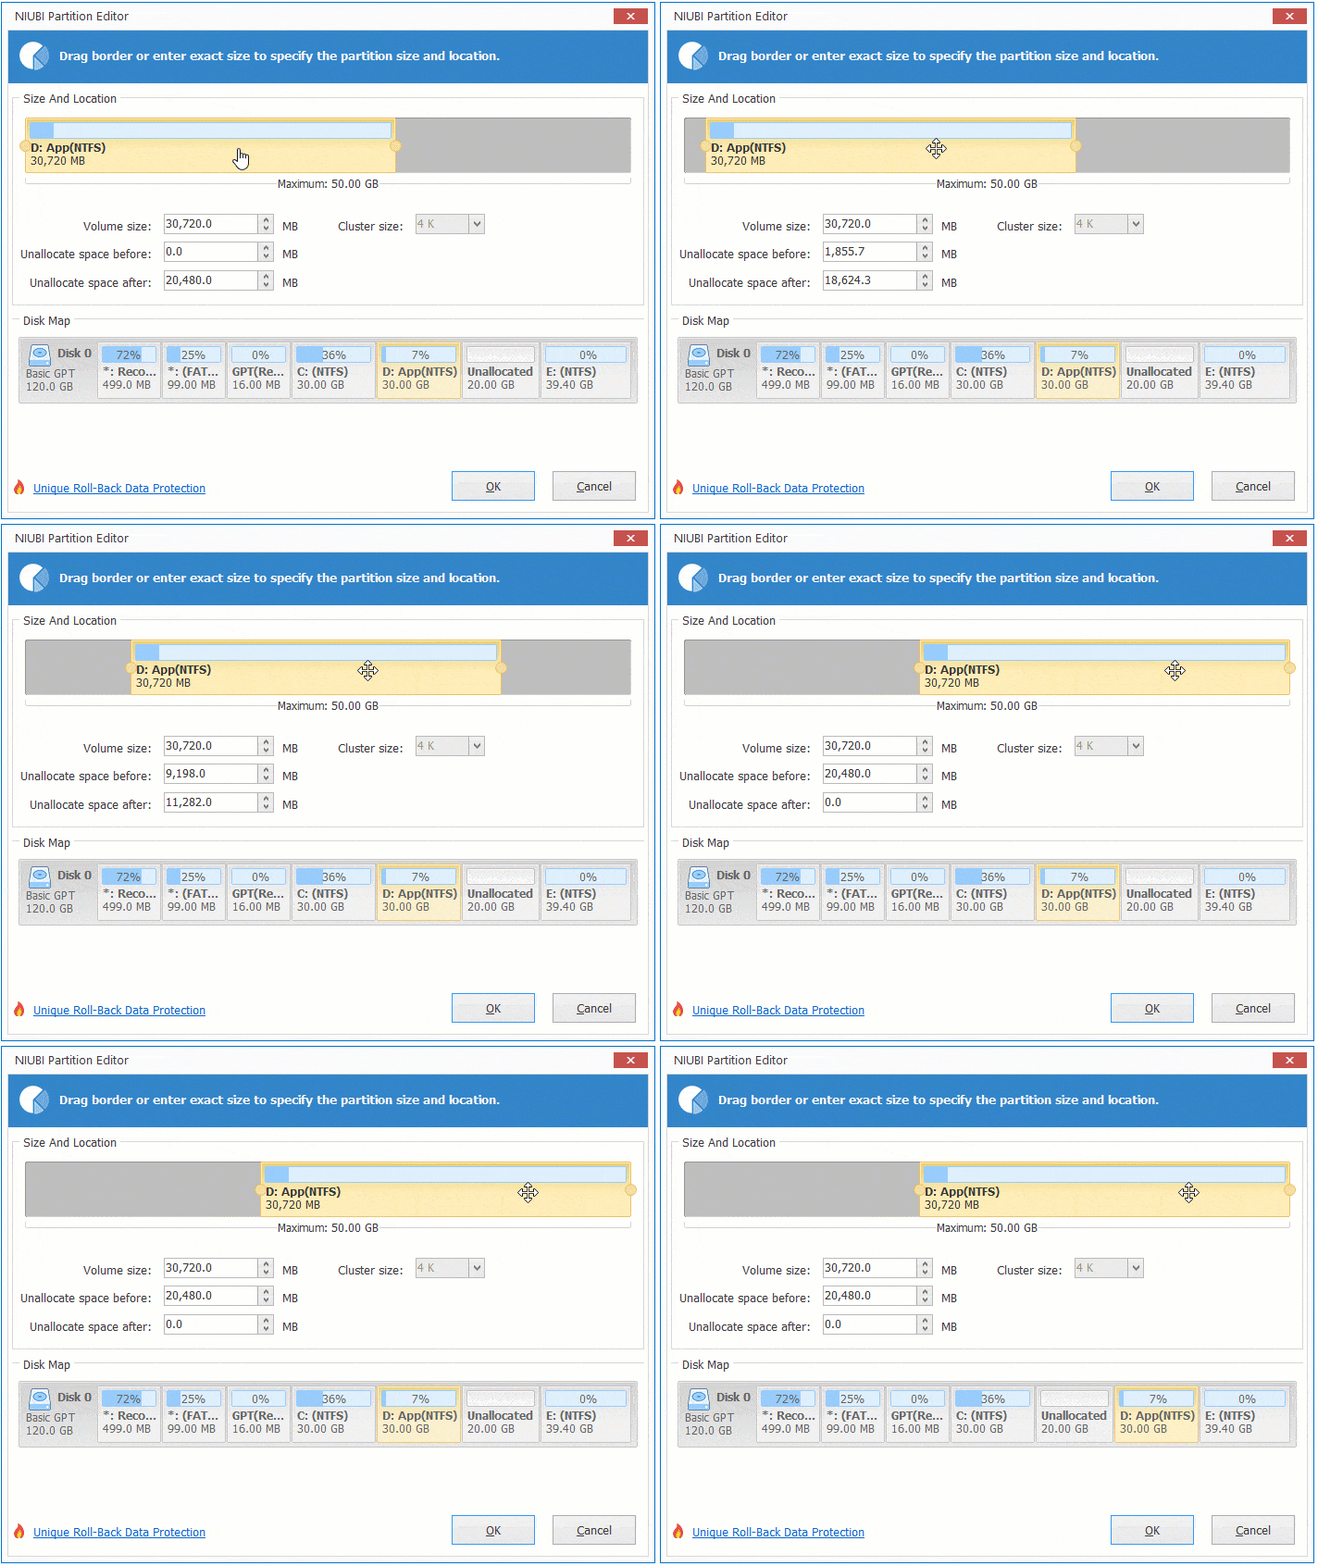
Step 1: Right-click partition D: and select "Resize/Move Volume", then drag the middle of the partition to the right. Then, the unallocated space will be moved next to the C: drive.
Step 2: Right-click the C: drive and merge the adjacent unallocated space using the same "Resize/Move Volume" feature.
Take Care of System and Data
There is a risk of system and data damage while resizing partitions, because all disk partition parameters must be modified, system boot-related files must be updated, and all files in the D: drive must be moved to new locations. Therefore, back up first and use safe partition software.
NIUBI Partition Editor features Virtual Mode, 1-Second Rollback, Cancel-at-Will, and Hot-Clone technologies, as well as an advanced file-moving algorithm to help resize partitions safely and quickly.
 © 2009 - NIUBI Technology All Rights Reserved. |